Quick DIY Tips To Fix Leaky Faucets Of Your RV Trailer

An RV can let you live the dream. But it can also become a nightmare when things start to break down.
Wear and tear happens to even the most well-maintained car. Add on all the fixtures and appliances of a home and there’s lots of little problems that crop up.
Your favorite plumber likely won’t be available when you’re on the road.So knowing how to fix a leaky faucet in your RV means you can keep enjoying life on the open road without scrambling to find a professional.
Let’s take a look at some of the most common reasons your RV faucet might leak.

Why Is My RV Faucet Leaking?
Finding the cause of the problem is the first step to fixing it.
Reasons your faucet might be leaking include:
- Worn out or damaged O-rings or washers. An O-ring is a rubber or silicone seal that keeps water from leaking out around the faucet handle or spout. Washers do a similar job, usually where separate components connect. Over time, the rubber can become brittle and start to crack, and O-rings can get worn out or damaged, causing leaks.
- Loose or damaged connections. If your supply lines are loose or damaged, water may leak from the connections.
- Corrosion or mineral buildup. Rust and mineral buildup inside a faucet can restrict the proper flow of water and cause leaks. You may be able to prevent this with regular maintenance and cleaning, but sometimes it’s unavoidable.
- High water pressure. Not all campgrounds monitor their water pressure, and it can be inconsistent. Water pressure above 40-50 psi can stress your plumbing system and lead to serious leaks. A pressure regulator can protect your RV’s plumbing system.
- A faulty faucet. Sometimes it’s the faucet itself that’s the problem. Any number of components can break down or just be faulty. The cartridge or valve can become faulty. Components can get cracked or damaged. Sometimes the way a faucet was installed can cause problems.
How Can I Fix My Leaky RV Faucet?
There are certain things you can fix on your own and some you can’t. Let’s take a look at the best approach for how to fix your leaky RV faucet without professional help.
- First, turn the water supply off before starting any repairs. An RV will frequently have a red supply line for hot water and a white or blue for cold. You may have a shut off valve in the cabinet under the faucet. However, many RVs don’t have a separate shut-off just for the kitchen sink, so you’ll need to shut off your water pump entirely in some cases.
- Turn the faucet on to allow excess water to drain out and relieve pressure in the line. (And make sure the water supply is turned off!)
- Remove any mounting nuts to remove your faucet. You may need to remove your faucet handle to access the mounting screw. In some cases you’ll have to disconnect your supply lines as well.
- Depending on what type of faucet you have, you may need to remove a cap or cover to access the cartridge or O-rings. This is usually just under the handle.
- Carefully remove the old cartridge or O-rings. There may be screws, clips, or fasteners holding it in place.
- Replace the cartridge or O-rings and be sure they’re in the same position and orientation as the old one. Your replacement parts should come with instructions from the manufacturer.
- Reassemble the faucet and turn the water supply back on. Check for leaks and tighten any connections that may be loose.
- Reattach your handle and secure it with the screw. Test the faucet a few times to be sure it’s working correctly.
If you need to disconnect any threaded connections like your supply lines, be sure to use plumber’s tape on the threads before reconnecting it.

When Should I Replace My RV Faucet?
In some cases, it’s easier and more reliable to replace your faucet completely.
Sometimes the faucets and fixtures that come standard aren’t the highest quality. High quality faucets can last years without an issue, but lower quality faucets may wear out pretty fast.
Your faucet may also wear out quickly if you use your RV a lot, especially in areas with very hard water.
Likewise if your RV is often exposed to extreme temperatures or harsh environmental conditions. In these situations, rubber and plastic components may be more likely to crack or become brittle.
The good news is that replacing your RV kitchen or bathroom faucet is a quick project that’s usually very easy to do on your own without a pro. Happy travels!
The latest tips, straight to your inbox
RELATED POSTS
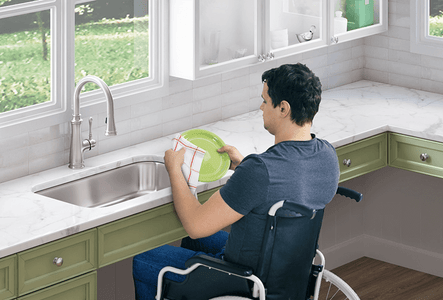
- ADA Faucets - Choosing Accessible and Aesthetic Designs
- The Ultimate Guide to Kitchen Faucets for Multifamily Buildings
- Designing the Ultimate Kitchen Sink Area
- What to Look for in a Retrofit Farmhouse Kitchen Sink
- Kitchen Sink Styles for Multifamily Buildings
- 5 Cleaning tips for your fireclay farmhouse sink
- Vitreous China vs. Porcelain: What’s The Difference?


